A cabinet paint job that starts flaking within weeks or months is frustrating, but it is rarely a mystery. Peeling and chipping usually trace back to surface preparation, product choice, or the condition of the cabinet surface underneath. Fixing peeling cabinet paint means dealing with the cause, not just touching up the visible damage. If you paint over a failing layer, the new coat will follow the old one right off the door.
This breakdown covers why latex paint fails on cabinets, how to diagnose the damage, the repair steps that actually hold, and how to decide between a weekend patch job and a full refinish.
Why Latex Paint Peels and Chips on Cabinets
Latex paint is a common culprit on kitchen cabinets, and the reason is usually a mismatch between the paint and the surface or the environment. Cabinets sit in a room with grease, moisture, heat, and constant handling. Doors and drawers get pulled, wiped, and bumped daily. A coating that bonds poorly will loosen under that kind of use.
Some of the most common failure patterns include:
- Painting over a glossy or greasy surface without proper cleaning and dulling
- Skipping primer, especially over bare wood, laminate, or a previously painted finish
- Applying latex directly over an older oil-based or factory finish that never received a bonding coat
- Laying paint on too thick, which creates a skin that cracks and lifts
- Painting in humid or cold conditions that prevent proper curing
- Moisture trapped in the wood, which pushes the coating away from the surface
The research on peeling cabinet finishes points to the same root issue repeatedly: adhesion. Paint needs a clean, sound, slightly textured surface to grab. When any of those conditions are missing, the film fails.
Diagnosing the Damage Before You Repair It
Before you sand anything, look closely at what is happening. Peeling and chipping are not identical problems, and the fix differs.
Peeling
Peeling usually shows up as sheets or flakes lifting away from the substrate, often along edges, around hardware holes, or near the bottom of doors where moisture collects. If the paint comes off in a thin film that leaves a smooth surface beneath, the bond failed between the coating and the cabinet. If it comes off with wood fibers attached, the problem may be deeper, such as moisture or a failing previous finish.
Chipping
Chipping is localized damage, typically at corners, edges, and spots that get struck or rubbed. A chipped area may look like a small crater with a hard edge. Chipping alone does not always mean the whole finish is bad, but when chips multiply across many doors, the coating has likely lost flexibility and adhesion.
Checking for Deeper Problems
Press a fingernail or a thin scraper into an intact area near the damage. If the paint lifts easily, the failure extends beyond what you can see. Look for soft or swollen wood, dark staining, or a musty smell, which can point to moisture. The research pack does not confirm a direct link between peeling paint and mold, so treat any suspected moisture issue as something to investigate and address before repainting rather than assuming the cause.

Tools and Materials for the Repair
The supplies are straightforward and mostly inexpensive. The research supports a sequence built around scraping, sanding, cleaning, filling, and priming.
- A carbide scraper or putty knife for lifting loose paint
- 100-grit sandpaper for removing failed coating
- 220-grit sandpaper for smoothing patched and repaired areas
- Fine-grit sandpaper for final surface prep
- Tack cloths for removing dust
- A damp cloth and mild cleaner
- Sandable filler for gouges and deeper defects
- Primer
- Cabinet-appropriate topcoat
Note the order the research emphasizes: sand and prime before applying filler. That sequence helps the filler bond properly and keeps the wood from pulling moisture out of the filler before it sets.
Step-by-Step Repair of Peeling and Chipping
1. Remove Every Loose and Failing Edge
Using a scraper or 100-grit sandpaper, remove any loose, cracked, or peeling paint from the damaged area. Work past the visible edge of the damage until you reach coating that is firmly attached. Feathering the boundary matters. A hard ridge between bare surface and intact paint will telegraph through the new finish and become a fresh failure point.
2. Sand the Surrounding Surface
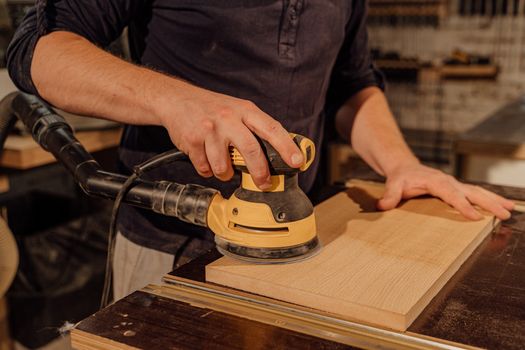
Once the loose material is gone, sand the repaired and surrounding area. Use 220-grit sandpaper to smooth patched areas, and a fine-grit paper for general surface prep. Sanding serves two purposes: it levels the repair and it creates the light texture that helps the next coating bond.
3. Clean Thoroughly
Wipe everything with a damp cloth, let it dry, and then sand with fine-grit sandpaper as needed. After sanding, wipe again with a tack cloth to remove dust. Kitchen cabinets carry grease film that is invisible until paint refuses to stick to it, so cleaning is not optional. The research describes this damp wipe and tack cloth routine as part of the prep for painting previously finished cabinet surfaces.
4. Prime the Repaired Area
Apply primer to bare and repaired spots before filler goes on. Primer gives the filler a stable base and slows moisture absorption from the wood. On larger areas where the old finish was removed down to the substrate, priming the whole panel gives you a uniform surface for the topcoat.
5. Fill Gouges and Deep Defects
Apply a sandable filler to dents, gouges, and areas where chipping took material with it. Keep the application thin and build in layers if needed. Once cured, sand smooth with 220-grit, then wipe off the dust.
6. Spot Prime Again
Prime over the sanded filler so the patch does not absorb topcoat differently from the surrounding surface. Unprimed filler can dry at a different rate and show as a dull or textured spot under the finish.
7. Apply the Topcoat
Apply thin, even coats and let each one cure according to the product directions. Thin coats cure more reliably than heavy ones, and heavy application is one of the common causes of cracking and lifting. Sand lightly between coats if the product instructions allow it, and keep the work area ventilated and within the temperature and humidity range the label specifies.
What to Put Over Painted Cabinets to Prevent Chipping
Protection after the repair matters as much as the repair itself. A durable topcoat designed for trim or cabinetry will resist chipping better than a standard wall paint. The research does not specify particular product lines, so match the coating to the substrate and follow the manufacturer’s guidance on recoat times and cure windows.
Hardware placement is another practical defense. Bumpers on door corners and felt pads behind cabinet doors absorb impact and reduce the chips that come from contact. Careful wiping with mild cleaners instead of abrasive pads also extends the life of the finish.
When a Patch Job Is Not Enough
Spot repairs make sense when the damage is limited to a few edges or a single door. They make less sense when peeling shows up across multiple doors, when the finish lifts easily under a fingernail test, or when the failure returns after a previous touch-up. In those cases, the coating system itself has failed and the reliable path is to remove the failing finish and rebuild it from the substrate up.
Cabinet refinishing done as a full process addresses the parts that spot repairs skip: consistent sanding across every surface, a bonding primer over the entire cabinet, and a controlled application of the topcoat. That consistency is what separates a finish that lasts from one that begins peeling again within a season.
Why the Original Job Failed
If a prior latex job is peeling, it helps to name the mistake, because the repair must correct it. The most frequent causes supported by the research are inadequate cleaning, missing or wrong primer, and application over a slick or glossy surface. Each of those leaves the same result: a coating that never bonded.
A second factor is thickness. Thick coats feel durable but cure unevenly. The outer skin hardens while solvent or water remains trapped below, and that trapped material becomes the weak layer that lets the film lift. Thin coats, proper dry time, and patience between steps solve most of this.
Third is environment. Cabinets near a sink, dishwasher, or cooktop face more moisture and grease than cabinets on a dry wall. A finish that works in a hallway may struggle in a kitchen. Choosing a coating suited to the conditions, and preparing the surface for that coating, gives the finish a real chance.
Deciding Between Repair and Refinish
Use the scope of the damage as your guide. A single chipped corner, a peeling edge along one door, or a small patch around a handle is a repair. Widespread lifting, peeling that spans door faces, or paint that releases from the surface with light pressure points to a refinish.
Time also counts. If you have already patched the same area more than once and the peeling keeps returning, the underlying bond is not sound and another patch will not change that. Repainting over failure simply restarts the clock.
For homeowners in Highlands Ranch, Castle Rock, Parker, Castle Pines, and Roxborough, a professional assessment can settle the question quickly. PaintingCabinet.com offers free estimates and can be reached at 303-573-6666. The company specializes in factory-finish cabinet painting and refinishing with no replacing or demolition, a dustless process, and a 3-year warranty.
Frequently Asked Questions
Can I just paint over peeling cabinet paint?
No. Painting over a failing layer traps the problem and the new coat lifts with the old one. Scrape away loose and cracked paint until you reach coating that is firmly bonded, then sand, clean, prime, and repaint. Skipping the removal step is the most reliable way to repeat the same failure.
Why did my latex paint peel off the cabinets?
Adhesion is almost always the reason. Grease or gloss left on the surface, a missing primer, or application over an incompatible older finish will prevent the paint from bonding. Thick coats and humid conditions can also cause lifting. Identifying which condition applied helps you correct it before repainting.
Should I sand and prime before using filler?
Yes. Sanding and priming before filler helps the filler bond properly and stops the wood from pulling moisture out of the filler. After the filler cures, sand it smooth with 220-grit sandpaper, remove the dust with a tack cloth, and spot prime the patch before the topcoat goes on.
How do I know if the whole finish needs to be redone?
Check several intact areas with a fingernail or thin scraper. If the paint lifts easily in multiple spots, or if peeling has returned after previous touch-ups, the coating system has failed and a full refinish is the dependable route. Isolated chips and single-door damage can usually be repaired.
What helps prevent chipping after the repair?
A durable topcoat suited to cabinetry, applied in thin coats with proper cure time between them, gives the best protection. Add bumpers to door corners and felt pads behind doors to absorb impact. Clean with mild products rather than abrasive pads, and address moisture near sinks and dishwashers before it reaches the cabinet surface.